so lets start with the backstory…
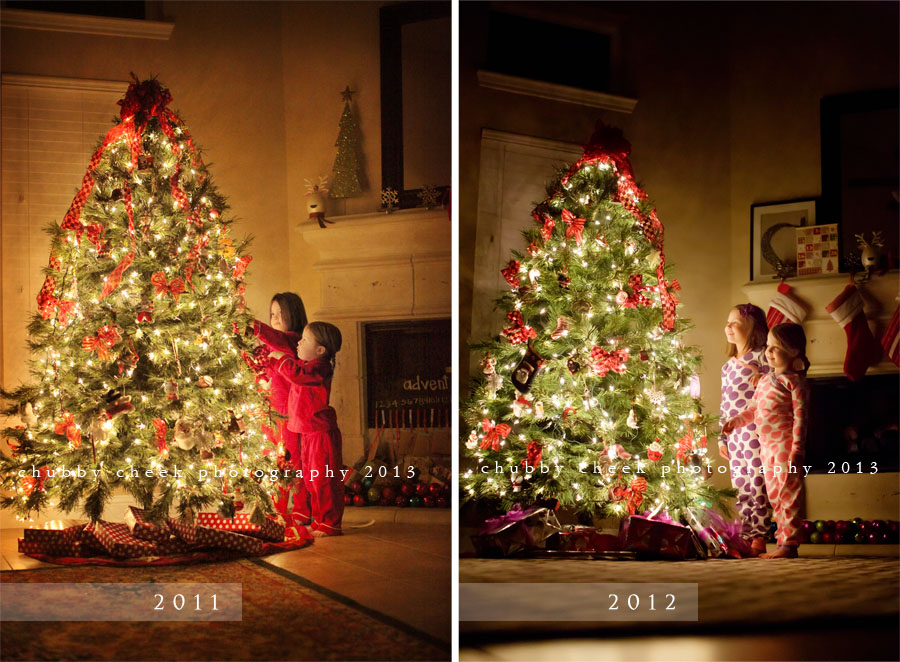
From our very first Christmas i have always taken this image of my girls… SEE some of them here, and here and here This image is so much more than an image to this mama… It has always been one of my favorite memories to make every year and one of my favorite moments to look back on every year…its shows growth, obviously from them but also from me and this business, its shows how our world has changed, moving from our first home the one i brought them home from the hospital to, to our new home…it shows them who they were in that moment, from one of the very first ones where cheeks #1 had taken so well to her new role as a big sister and held her arm around her barely-sitting-on-her-own 6 month sister to 2011 when it was very obvious cheeks#2 was NOT interested in picturing taking that night….it shows me everything i have to be thankful for, it will show them and their children years down the road the reflection of love i see when i look at them together. it is one moment in this amazing, beautiful mess that i get to live every single day.
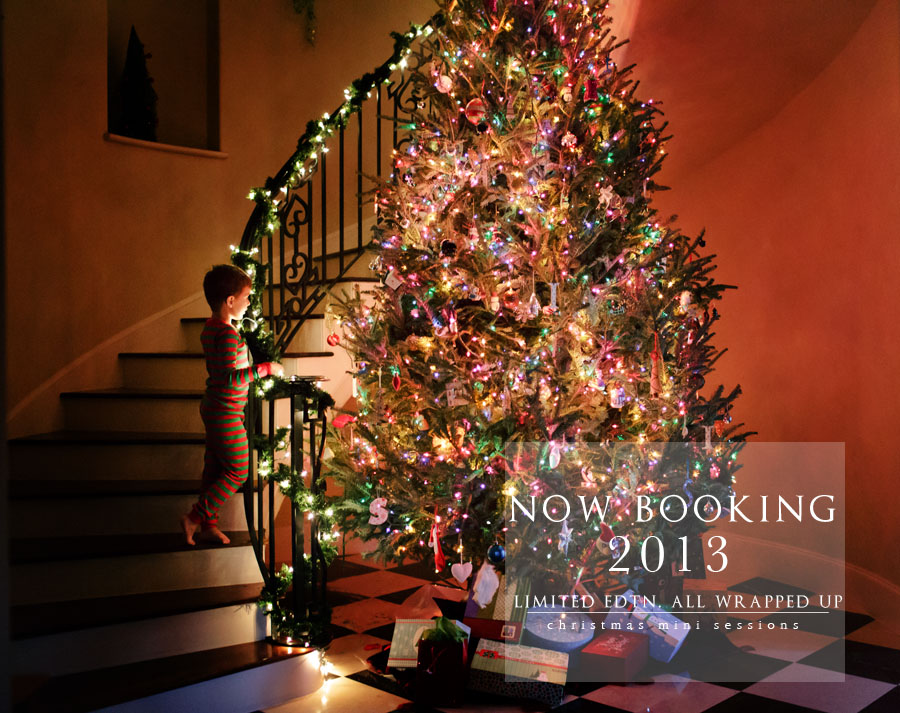
Well two years ago i decided to extend this tradition to those around me, the people who have supported me, who cheer me on year after year and the amazing people who share their very own moments all year long with me and then the idea of the “present” session came to life. I love seeing my clients throughout the year, and the little party we have early sunday morning once a year for coffee and cards was just not enough. Now i get to see their home, hear the voices running down their halls and the story behind their ornaments…i get to enter THEIR REAL WORLD…and even if its only for a moment its a moment i will always remember.
so here we go my tutorial ummm my list of ways to help you photography your own tradition:
1. THE TECHNICAL STUFF:
you obviously need a dslr or at the very least a camera that you can shoot with in manual not auto because you don’t want that icky flash to fire.
ISO: you will want to crank up your iso as high as you can get it to go…yes you will have some noise/grain, but if you are a photographer and you shoot in raw you can fix a good bit of that in post.
SS: i do not go below 1/200 ss BECAUSE I DO NOT use a tripod and i have a shaky hand ha. You can go lower if you like to let more light in however you will need to use a tripod or a makeshift one, so that you can prop your camera up on it. but if you have kids in the pic that are not likely to be still (and lets face it i hate asking kids to be still) then you shouldn’t go any lower or you will get motion blur as they move
AP: this is where having L glass will come in handy or at the very least NOT THE KIT LENS. you will need to lower your ap pretty low, again to let more light in. for most of my shoots my aperture is 1.2-2.2
lets talk about white balance: i recently switched to shooting in kelvin which sets white balance based on temperature, you can choose Auto if you prefer bc if you have all white lights (like the warm white) your lights will be very yellow.
exposure: you will want to meter off of your subjects face or at the very least watch your histogram because the dark vs light will throw your camera off when looking at the whole scene. the point is you want your subjects face properly exposed.
2. THE LIGHTS:
i do not prefer colored lights, im a warm white light kinda girl. Colored lights throw off some crazy colors casts that are difficult to fix however if you are a colored light kinda gal then i suggest you add more white lights in the mix, this will help balance our the color casts a bit.
GET MORE LIGHTS! i tell my clients every year to add an additional box of lights to their tree even if they think they have enough (this year 2 of them had over 500 lights on their massive trees if that helps you get the picture ha)
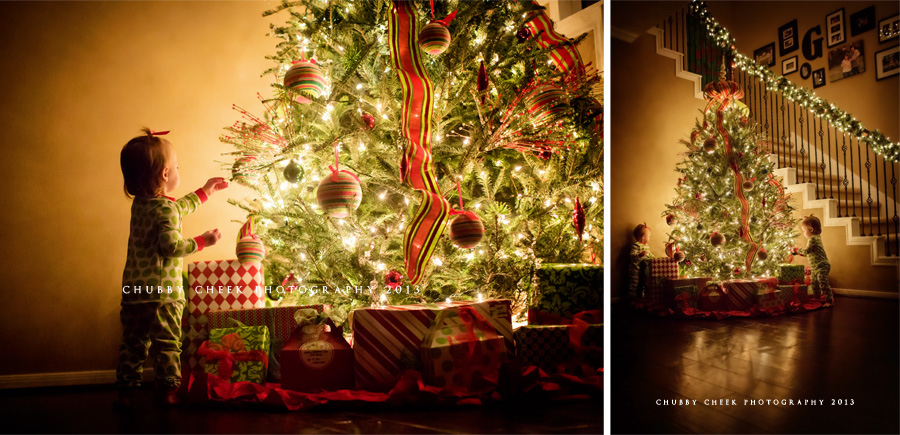
the intensity of the lights will make it hard to focus on your subject so in most cases you will want your subject facing the tree but for the silhouette shot you want the subject to be on front of the tree by a bit of distance.
turn off every other light in the room with the tree. essentially you want the tree to be the only source of light, this helps create that “glowy” effect
if your tree if by yoru fireplace be sure to turn the fireplace on! it does add some external light which is the opposite of what i just said however it just makes the whole image fee a bit warmer.
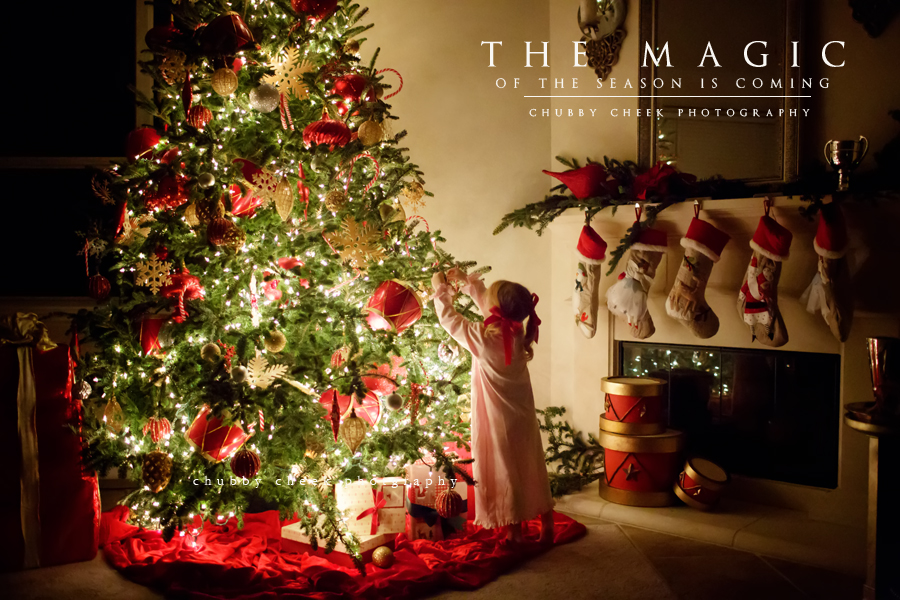
3. THE PRESENTS:
believe me on this one YOU WILL WANT PRESENTS UNDER YOUR TREE! this is vital, as you can see from one of my earlier shoots, the shoot without presents under it just looks plain ol silly! I kid you not when i say i may or may not admit to wrapping empty boxes in the past 🙂
so either do your Christmas shopping early and wrap real ones or fake it 🙂
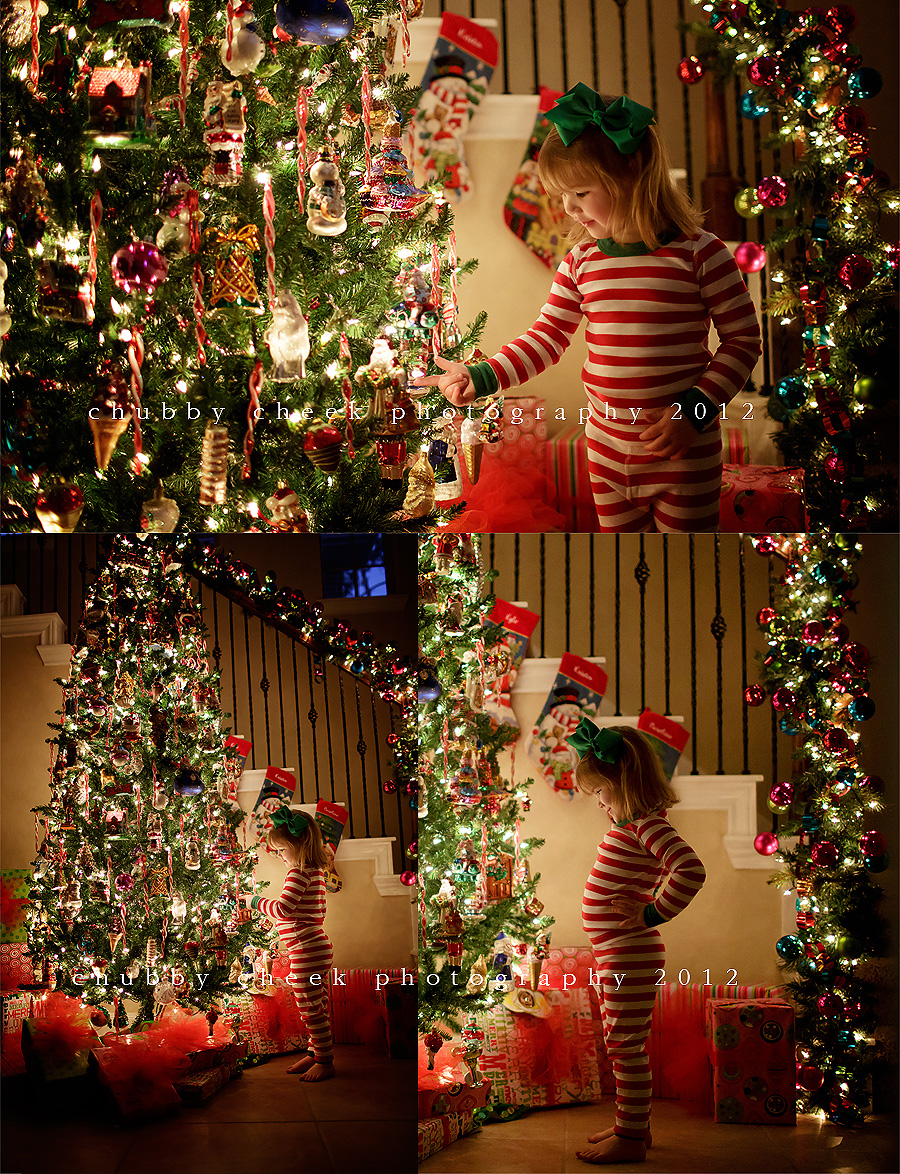
4. THE JAMMIES:
so in my opinion this is a must also! get some jammies
tighter jammies look best on little baby bellies like the ones we use alot from hannah anderson, but gap’s red fleece jammies are pretty perfect as well as pottery barn kids and may others…the point get CHRISTMAS jammies regular jammies dont have the same Christmasy magic effect.
5. THE STORY:
the magic is in the story not just the one shot!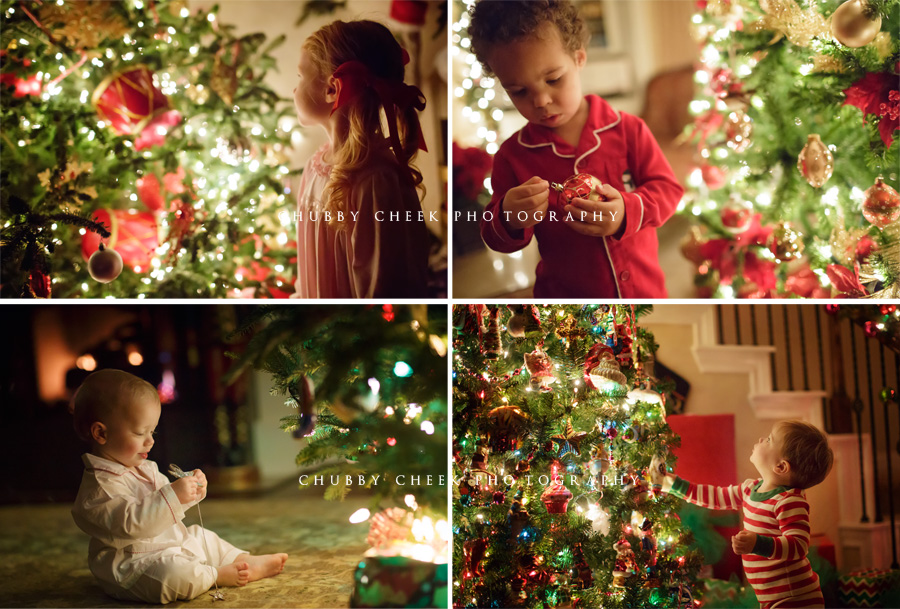
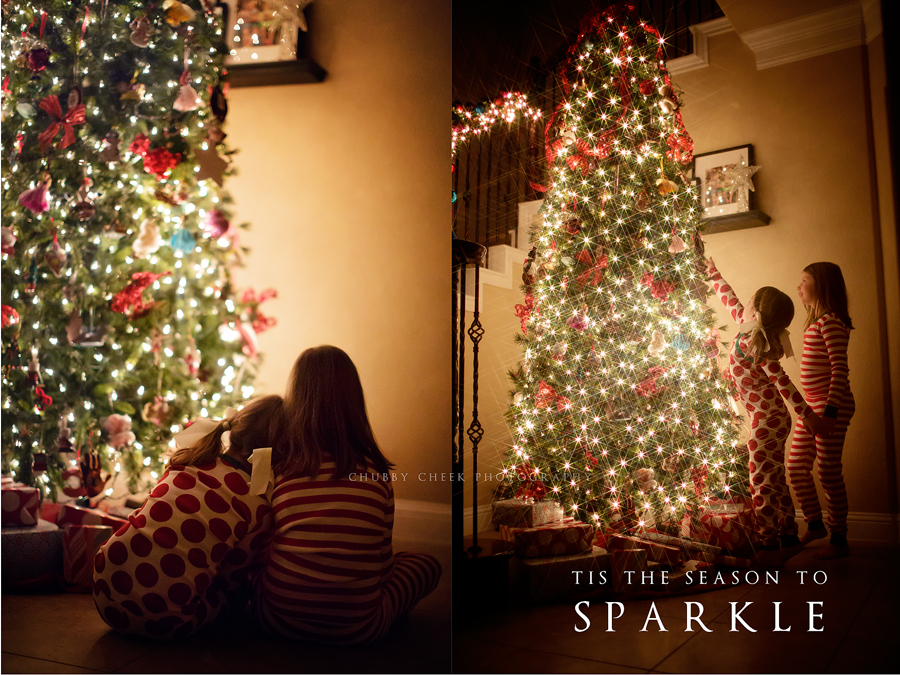
6. THE SPARKLE:
the elusive sparkle can of course be achieved with a very very very high aperture, but im talking about sparkle WITH KIDS IN THE SHOT! that is a special fliter that you can buy at any camera shop or site 🙂
okay lovies i think thats about it….eeeekkkkkk now go out and make your own tradition!!!! and Merry Christmas
Thank you so much for sharing this! I’ve been struggling with getting great Christmas tree shots since my son was born two years ago. Would you mind sharing what the name of this filter is so that I can search for it online please? Thanks again. Love your work!
Thank you so much for this tutorial. It was so helpful and now I am going to try this with my kids!
Love these photos! Thank you for the tutorial! I wish I had read this before I put the tree up as I don’t have nearly enough lights! LOL! Next year for sure though! Looks like I will have to go to all clear lights though!
So grateful for your selfless help! I took a stab at it last night in a client’s home. Here is the result!
https://www.facebook.com/photo.php?fbid=649680961741610&set=a.190573404319037.41186.123407011035677&type=1&theater
Thank you so much for this!!! I finally had a successful christmas tree photo session with my own kiddos because of you! http://jenycrewsphotography.blogspot.com/2013/12/blog-post.html
You are awesome!
Hello I really like this! I was wondering if you could help me I want to take photos of my baby and toddler in front of the tree but every time I do it it flops I don’t no what I’m doing wrong I’m shooting in manual and setting things right well I think I’m setting things right I read a lot of things and watched videos I wish I new what I was doing wrong I have a good camera its a canon t3 rebel so I don’t think its the camera this is my first year doing it and I wanna do a good job please help!
Pingback: Present sessions make my Christmas heart so happy… the woodlands tx in home photographer | North Houston, Tomball, Cypress & The Woodlands TX Child & Family Photographer
I am SO excited to try these photos this year with my two boys. Thank you SO much for sharing your tips with everyone!!
Hi.. Great shots! I’m curious as to what the special filter you use? Happy Holidays!
Pingback: Oh, Hey Friday | December Happenings
Hi! can you recommend the sparkle filter you used? I have a canon mirrorless camera and can’t seem to find a reasonable star lens!
What type of filter is it that you need?
Pingback: Toddlers And Christmas Trees – Wallpaper Site
Pingback: 10 Photos to Take for Baby's First Christmas - Baby Chick
Pingback: 10 Photos to Take for Baby’s First Christmas – Mother & Baby News